Thursday, February 1, 2018

Altered Box for A Vintage Journey Challenge

Hi everyone!
I've made an altered box for the challenge over at A Vintage Journey Blog where the theme is "think inside or outside the box"
I love to alter old cigar boxes, it's very time consuming but so much fun!
Here is my mixed media box using found objects, a vintage doll face and lots of texture elements. I really enjoy trying to use as many random bits I can find, often 'trash' I found laying around on the ground, lol (free embellishments!)
Here are some pics:


I used acrylic paint and waxes to color the box after first covering it in black gesso.
Thanks for stopping by!
Sarah xoxo

Monday, January 29, 2018

Rusty Canvas

Hi there, I'm dusting the cobwebs off my blog since I haven't been on here in ages! A while ago I accidentally deleted a years worth of blog posts and it was kinda frustrating. Also it's much easier to post pics on Instagram and be done with it, haha. I got some new Lindy's Stamp Gang sprays for my birthday and when I saw this month's moodboard I was inspired to make something rusty

Go here to check out the challenge!

I started out with an old canvas that I covered in tissue paper then added a vintage doily to the middle. I love those and had to force myself to use it because I am such a hoarder! Then I added some crackle paste and started gluing the elements on. I wanted to use some keys that I had altered and that funky broken guy with wings. It came together pretty easily and then I got to have some fun adding some texture and then color. I used some found objects and some art stones as well as microbeads and glitter (a requirement for the Lindy's Challenge.Here are some photos:


For the color I used acrylic paint, Prima Rust Pastes and Lindy's Starburst Sprays and Lindy's Embossing Powders. Here is a list of the Lindy's products and links to the store


Starburst Sprays:
Calla Lilly Burnt Orange 
Cocoabean Copper
Steampunk Sepia
Tibetan Poppy Teal 


Embossing Powders:
Byzantine Bronze
Oakleaf Olive
Hyacinth Blue Jade

Thanks for looking, this was so much fun to make, I have to urge to faux rust everything lately and Lindy's products are so fun to play with!
Sarah xoxo

Monday, October 3, 2016

Starting From the Same Place: Artist Collaboration

OMG, I cannot believe I haven't updated this blog since June of last year! My only excuse is that once I joined Instagram, it was so much easier to just post there where my fellow art friends could see mine and I can see theirs. But I have missed it!
 
 I joined in this fantastic artist challenge hosted by Tina Walker, where we were all sent the same (or just about the same) materials to create an art piece with, and it involved over 60 participants from around the world! I must say that it was somewhat challenging, I haven't really worked with fabric and the biggest item in the box of goodies was a piece of fabric! And there were two other pieces of fabric to incorporate. It was easy to come up with the idea of the rolled back canvas as I had been wanting to attempt that for a while. I thought it would help give a fun, whimsical look.


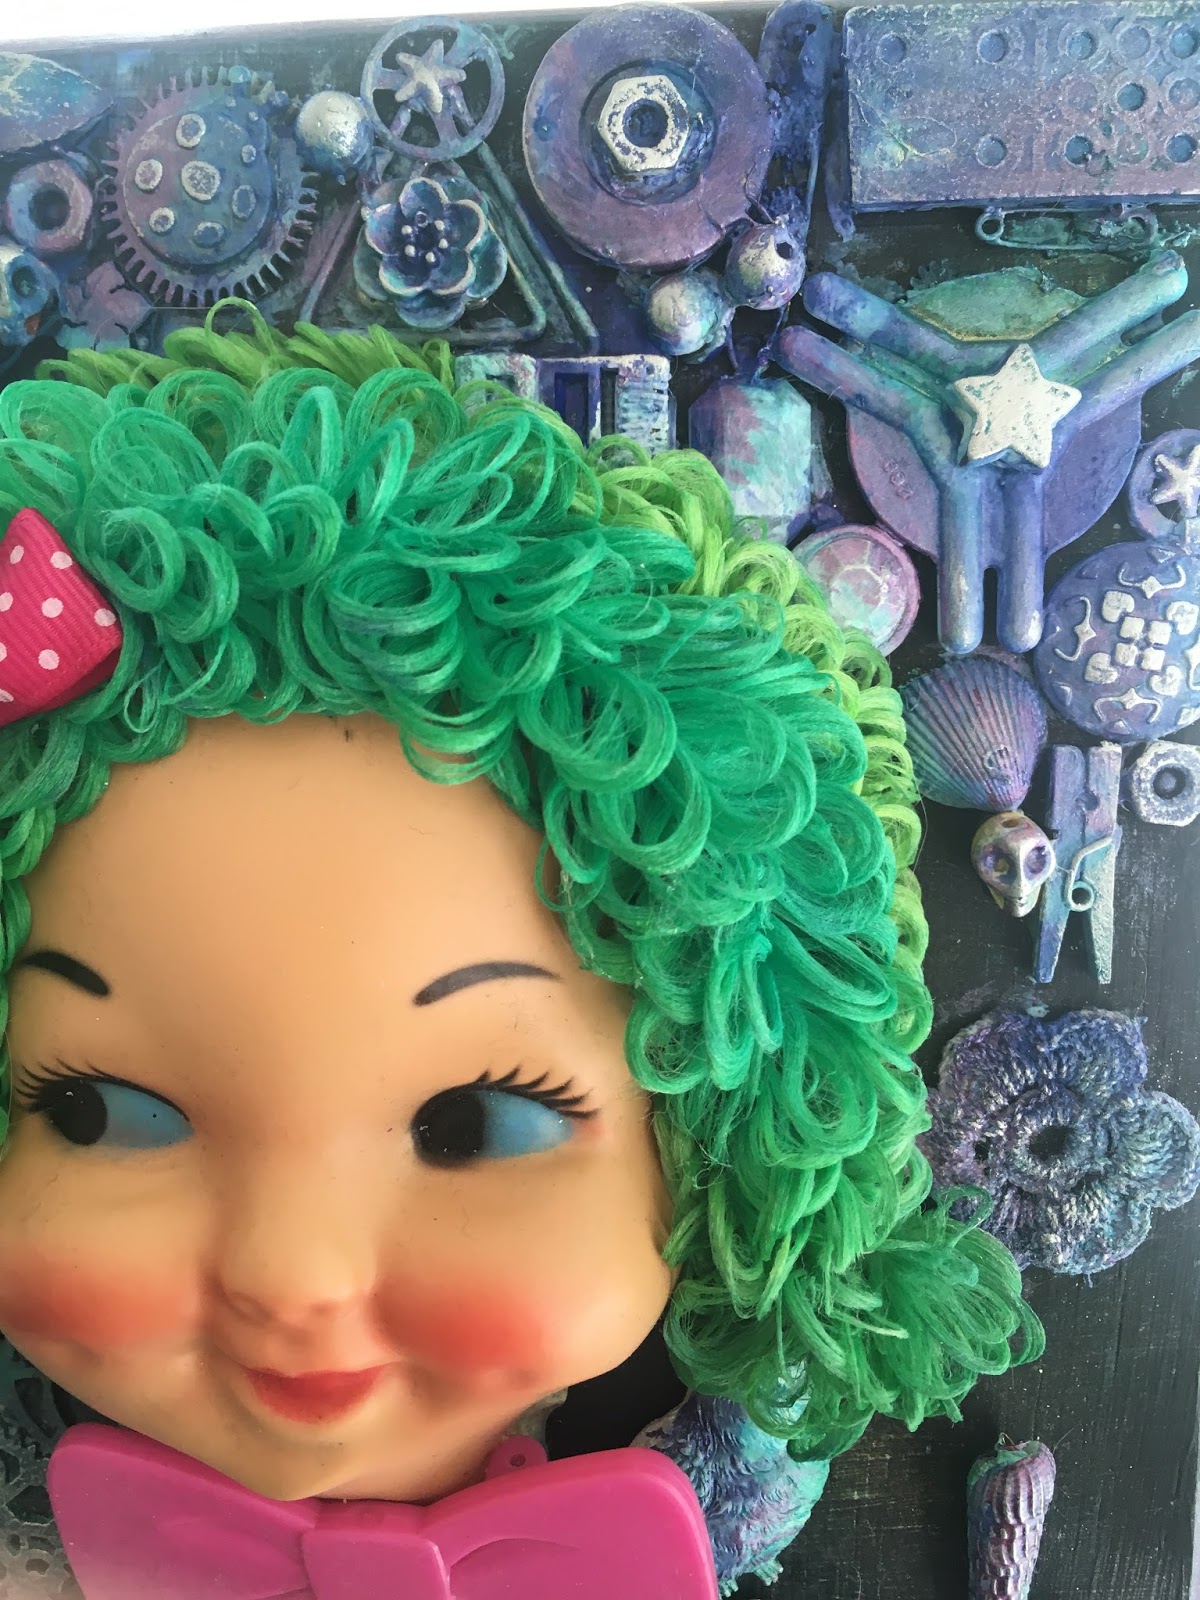
I ended up painting the white/beige/black fabric green and making it my "grass" and added some little balls and glitter. Beacon provided (in our package of goodies) some trial tubes of their fabulous "fabritac" which made gluing the fabric and all the embellishments so much easier. The view master reel and gears immediately screamed "flower" to me, so that came together pretty quick. I used the thread to hand stitch the flower stem, and the wires to make hearts going around the flower. The stencil from Stencil Girl was used on the top canvas to make a pattern around the perimeter. The molded pieces (flowers, gear and dragonfly) were made with Amazing Casting Products Resin. The trickiest part was the dragonfly, I just didn't know where to put it! I glued my top, rolled back canvas onto the bottom canvas that was already painted/decorated. I was going for a window effect.

Here are a few close ups:

 I found this project to be very hard to photograph, there are a lot of details that don't come across on my lousy old iphone camera but if you click on the photo you can probably see the glitter and the heart wire thingies a little better. I used various kinds of fine and glass glitter, microbeads and Lumiere paint.


I really loved being a part of this project and having to step outside my comfort zone and use my creativity in ways I haven't in a while. I cannot wait to see what everyone else has created! The sneak peeks I've been seeing on Facebook are fabulous, so many different styles!

The group is titled "Starting From the Same Place: Artist Collaboration" 
Thanks so much for stopping by today! I would love for you to leave a comment if you have a minute and let me know what you think of our collaboration.
Sarah xoxo

Here are the links to the ladies who have shared their projects on their blog. Please go check out the artists blogs to see all of the many different styles and techniques used to transform a bunch of random items and materials into stunning works of art! If you leave us some love there's a giveaway on The Amazing Casing Products blog so go check it out!


Wednesday, May 7, 2014

Mother's Day Round Layout

Hi guys,
I wanted to share a round layout I made (out of a cardboard cake circle!) for my design team post for Scrapping4FunChallenges. Here is the challenge info:
Challenge #16
Happy Mother's day / Mother's day / Mother
Please use a "sentiment" with Happy Mother's day / Mother's day / Mother - using your native language for your creation. AFTER you linked up, PLEASE leave a COMMENT plus tell us what "native" Language you used for your sentiment.
  1. You can create a - Layout, Card, Canvas, Mini Album, "Off the Page" creations.
  2. Must be newly created as of 2nd of May 2014.
  3. Enter a direct link to your crations into the link tool, not to the main page of your blog. This makes it easy for the Design Team to find your creations to leave comments.
  4. Please, leave a comment - we love comments!!!!
  5. MUST be a FOLLOWER!!
This challenge is due Thursday 15th of May 2014, 23:55pm European Time.
Please, be aware of the time zone differences - on the top left you will find the Date and Clock on the blog. 

And here is my layout:

I started out by mod podging a napkin onto a cake circle because I am not great at cutting neat circles and I wanted to make a round layout for a challenge at the Flying Unicorn.  I then glued lace around the perimeter and added some paper layers and my photo.  I had these embossed swirls laying around and they matched so I added them, as well as the embossed gold piece on the top.  Then I glued on a few flowers and added "Happy Mother's Day" in stickers.  I made this for me, to display...to celebrate Mother's Day (the photo is my beautiful daughters). They really are the best thing that ever happened to me and my greatest gift.  I hope all you moms out there have a wonderful Mother's day doing something fun with the ones you love!

tI hope you guys can join in our challenge at Scrapping4FunChallenges! I can't wait to see what you create.

Sarah xoxo


Friday, April 18, 2014

Happy Easter!

Hi friends, Easter is almost here and I have finally got the nerve make up a few quick cards...I don't know why they are so hard for me but I will keep trying! I planned to send these to my nana and my mom so I didn't want to make them to dimensional in fear they would get squished.  Our theme for the design team at Scrapping4FunChallenges was "anything goes but you must use a stamped image or sentiment (or digi)." Hope you will play along with us!


Thanks for stopping by and I hope you and your family have a wonderful Easter weekend!
Sarah

Thursday, April 17, 2014

Inspire Box

Hey peeps, I wanted to share a box I created based on a tutorial over at the Flying Unicorn by Bex.  This was not the easiest for me to complete, but I'm pretty happy with the way it came out and I can't wait to try it again with different colors! Her tut is in the "challenges" section of the forum and it was from last month.  She is amazing at this kind of work and I was so thrilled that she shared her process on how to make this.  I was thinking of my nephew who likes keys when I created this and I hope he likes it!!

As you can see it started out as a plain wood box I picked up at the thrift store and I glued the keys on the top.

Next I ripped off a large piece of foil, crumpled it, then smoothed it out....then glued it over the whole box cover using mod podge.

Next I used acrylic paint and painted over the cover.

OK then you have to cover the whole box with black paint (MAKE SURE THE BLUE IS DRY FIRST) then wait until its slightly dry.  Then you will use a ton of baby wipes or towel etc. to rub a bunch of the paint off, exposing the blue underneath.

I apologize that I don't have pics of the last steps, I was covered in paint! Once I wiped off some black, I used Rub N Buff to highlight some of the keys and then added back in a little blue paint.  I painted the rest of the box black, then dry brushed some blue all around the sides then glued on the front embellishments.  Here is the result:


I made some mistakes and kept ripping the tin foil, but it was really fun to try something I had never done before and I'm sure with some practice I will get better! Please leave me a comment or link if you try or have tried this technique, I would love to see!
Thanks to Eclectric Paperie for the inspiration to use wood (their month's challenge) and I am also going to enter into the Inspiration Emporium challenge for using your "favorite things" (keys and Silks!)

Have a great day!!
Sarah


Thursday, April 10, 2014

Those who don't believe in magic...

Hey guys, I wanted to share the  second page of my wood pear inspiration book from GJS.  I decided a few months ago to alter each page with an inspirational quote that I could display in my studio and make me smile.   In case you didn't see it, here is my first page from a few months ago:

This time I decided to use a mauve/purple combo which not everyone loves, but I do! I painted the pear after priming, with acrylic paint from 13 Arts, then added some texture through a stencil using Art Anthology velvets. I added a resin butterfly, metal key and a ribbon from my stash.  Looking at this makes me happy. I can't wait to make page #3.


I added some Prima roses and tried to get the stem to sparkle using some glitter glue but it's not showing up great in the photos.

I am a huge fan of the Eclectic Paperie blog so I would like to enter this into the challenge for this month that is all about "wood."
I would also like to link up with another favorite site, Frilly and Funky where the challenge is "flights of fancy" and must include a winged thing...in this case it would be the resin butterfly. 

Thanks for joining me today, I hope you have a fabulous week!
Sarah xoxo